# Next.js, Nuxt & Astro Site Support Through Git
> Deploy JavaScript sites on FlyWP through Git with the shared setup flow, runtime selection, repository access, and release checks.
Source: https://flywp.com/docs/site/nodejs-sites/
Deploy a JavaScript application from a Git repository to a FlyWP-managed server. Use this guide for the common setup, then follow the separate [Next.js](https://flywp.com/docs/site/nodejs-sites/nextjs/), [Nuxt](https://flywp.com/docs/site/nodejs-sites/nuxt/), or [Astro](https://flywp.com/docs/site/nodejs-sites/astro/) guide for your application settings.
## In this section
- [Next.js](https://flywp.com/docs/site/nodejs-sites/nextjs.md): Configure and deploy Next.js on FlyWP using Server runtime or a static HTML export.
- [Nuxt](https://flywp.com/docs/site/nodejs-sites/nuxt.md): Configure and deploy Nuxt on FlyWP using a Nitro Node server or generated static pages.
- [Astro](https://flywp.com/docs/site/nodejs-sites/astro.md): Deploy Astro on FlyWP with static output or the standalone Node adapter and Server runtime.
## Before you begin
You need a FlyWP account with access to an active server, a Git repository containing your application, and permission to deploy its selected branch. Put `package.json` at the repository root: the current wizard explicitly states that monorepos are unsupported. A web directory selects what is served; it does not make a nested workspace a supported application root.
Commit your source, framework configuration, and package manager lockfile. Keep credentials and local environment files out of Git. Test a production build locally before configuring the deployment.
FlyWP introduced this feature in v2026.52. Its release announcement lists Node.js 24, 22, and 20, with version resolution from `engines.node`. The wizard says that an unspecified version uses the latest LTS. Set an explicit compatible major when repeatability matters; a framework's own minimum version still applies. [FlyWP feature announcement](https://flywp.com/changelog/nextjs-nuxt-astro/).
For example, merge this property into your existing `package.json` if your application supports Node.js 22:
```json
{
"engines": {
"node": "22.x"
}
}
```
## 1. Connect your Git provider
Open [FlyWP](https://app.flywp.com), then open [Git Providers](https://app.flywp.com/user/git-providers). You can also reach this page through **Manage Git Providers** in the site creation wizard.
Connect the provider holding your repository and complete its authorization flow. The current wizard displays GitHub, GitLab, and Bitbucket cards. A disconnected provider has a connection link; connect it before choosing its repository.
For GitHub, the wizard explains that public repositories are cloned directly. Private repositories receive a read-only SSH deploy key, which requires administrative access to the repository through the connected account. Organization access restrictions may also need to be resolved with the repository administrator.
## 2. Open the JavaScript site wizard
Use this access path:
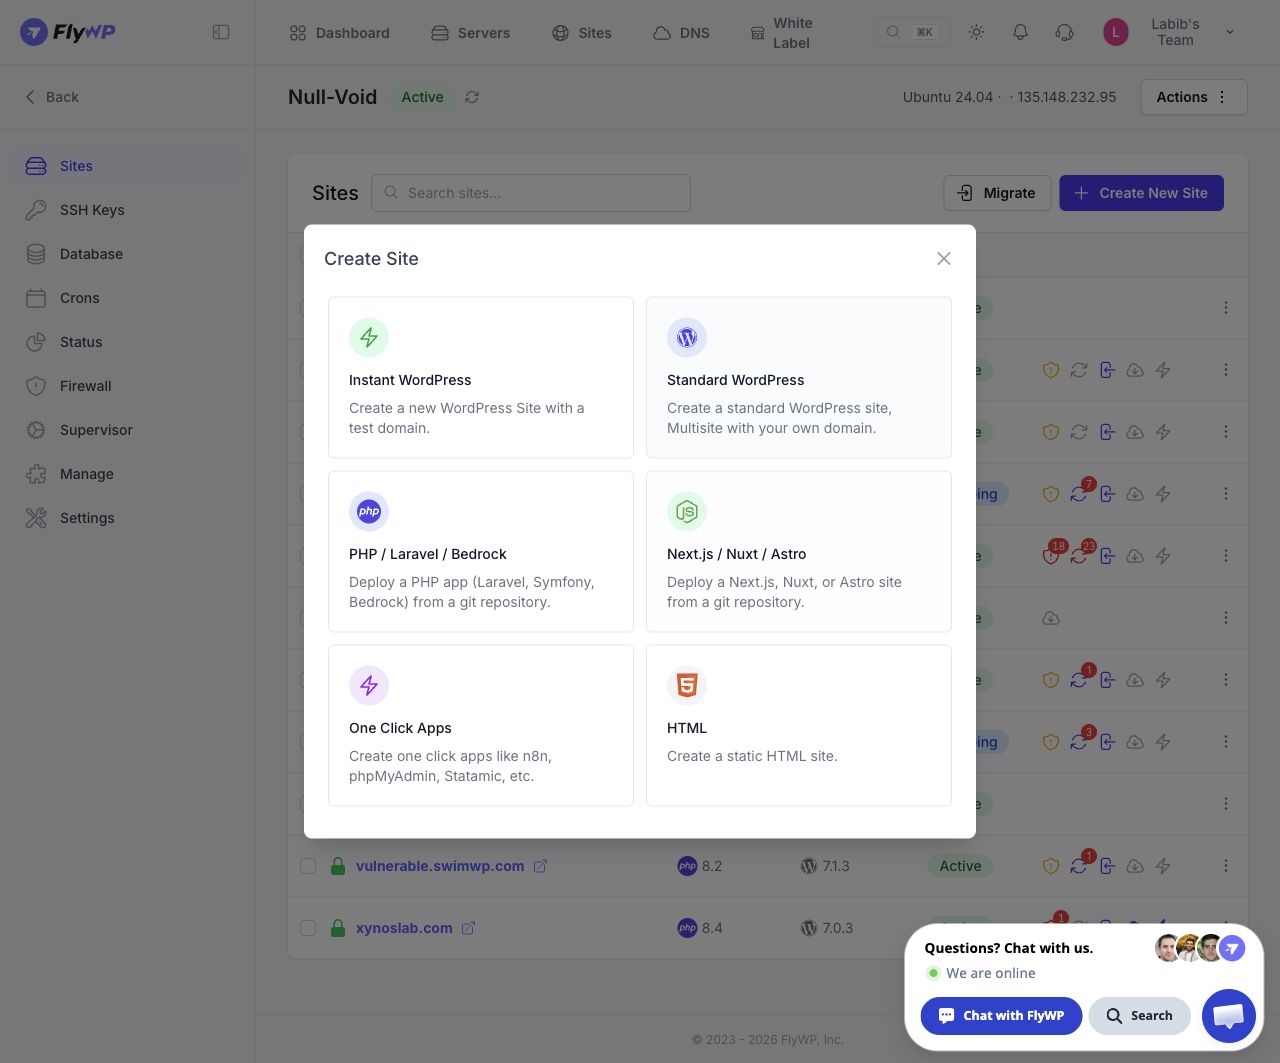
**Dashboard → New Site → Select Server → Continue → Node.js Next.js / Nuxt / Astro**
The application card opens **Create Next.js / Nuxt / Astro Site**. Its steps are **Domain → Configure Git → Installation → Summary**.
Select the JavaScript application card in the actual FlyWP app. Select the image to view the full screen.
## 3. Choose a domain
On **Domain**, choose one of these options:
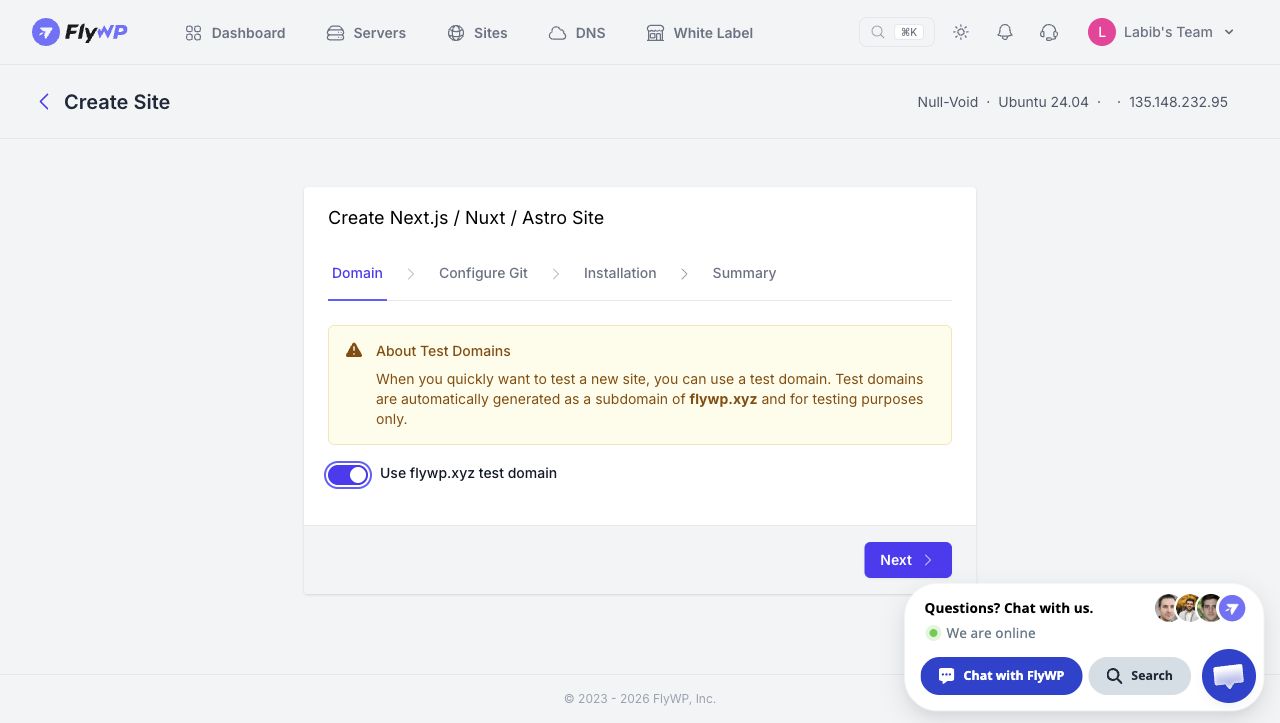
- Enable **Use flywp.xyz test domain** to have FlyWP generate a testing subdomain.
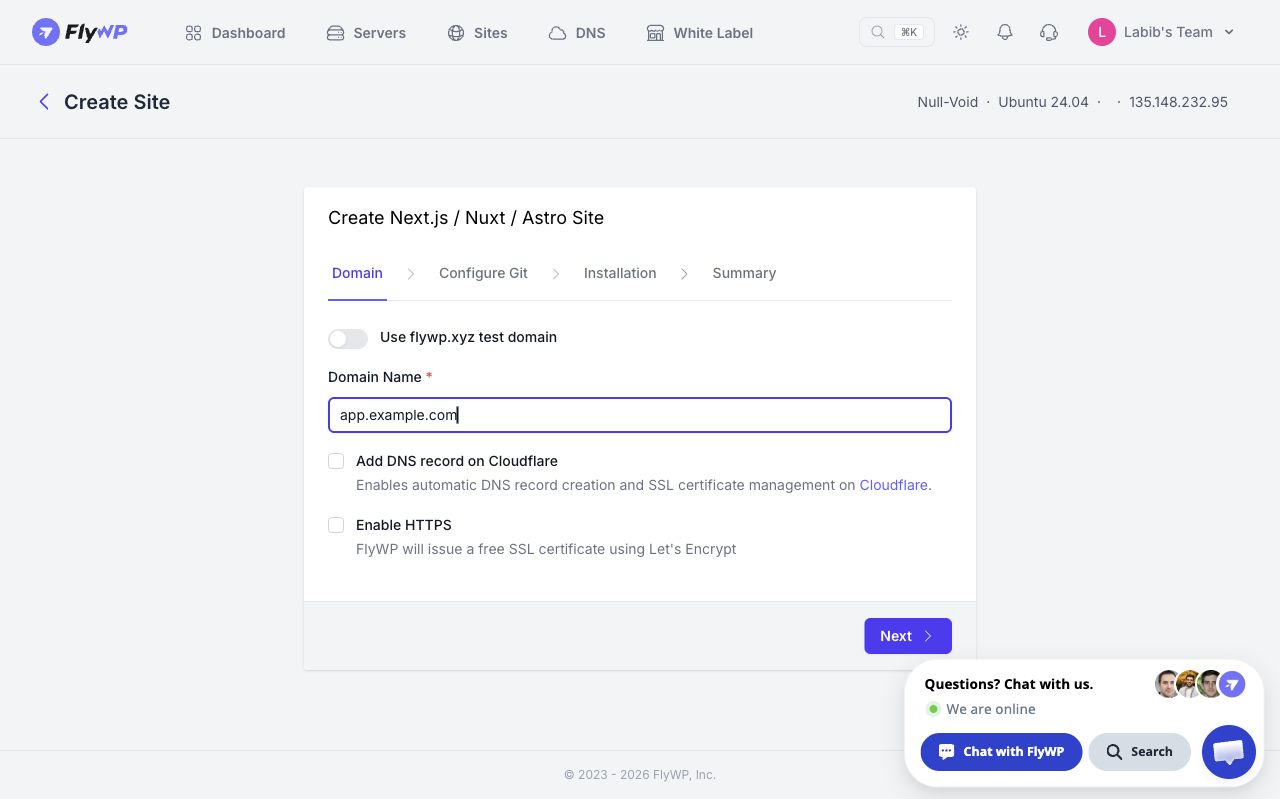
- Enter your own hostname in **Domain Name** for a custom domain.
For a custom domain, **Add DNS record on Cloudflare** offers automatic DNS and certificate management through a connected Cloudflare integration. **Enable HTTPS** requests a Let's Encrypt certificate. If you manage DNS elsewhere, configure the hostname with that provider and ensure it resolves to the intended server before checking certificate issuance.
Click **Next**. Test domains are described in the wizard as being for testing purposes; use your own domain for a production launch.
Custom-domain example. app.example.com is an illustrative value; no site was created. Select the image to view the
full screen.
The test-domain option and its testing notice. Select the image to view the full screen.
## 4. Configure the application and Git source
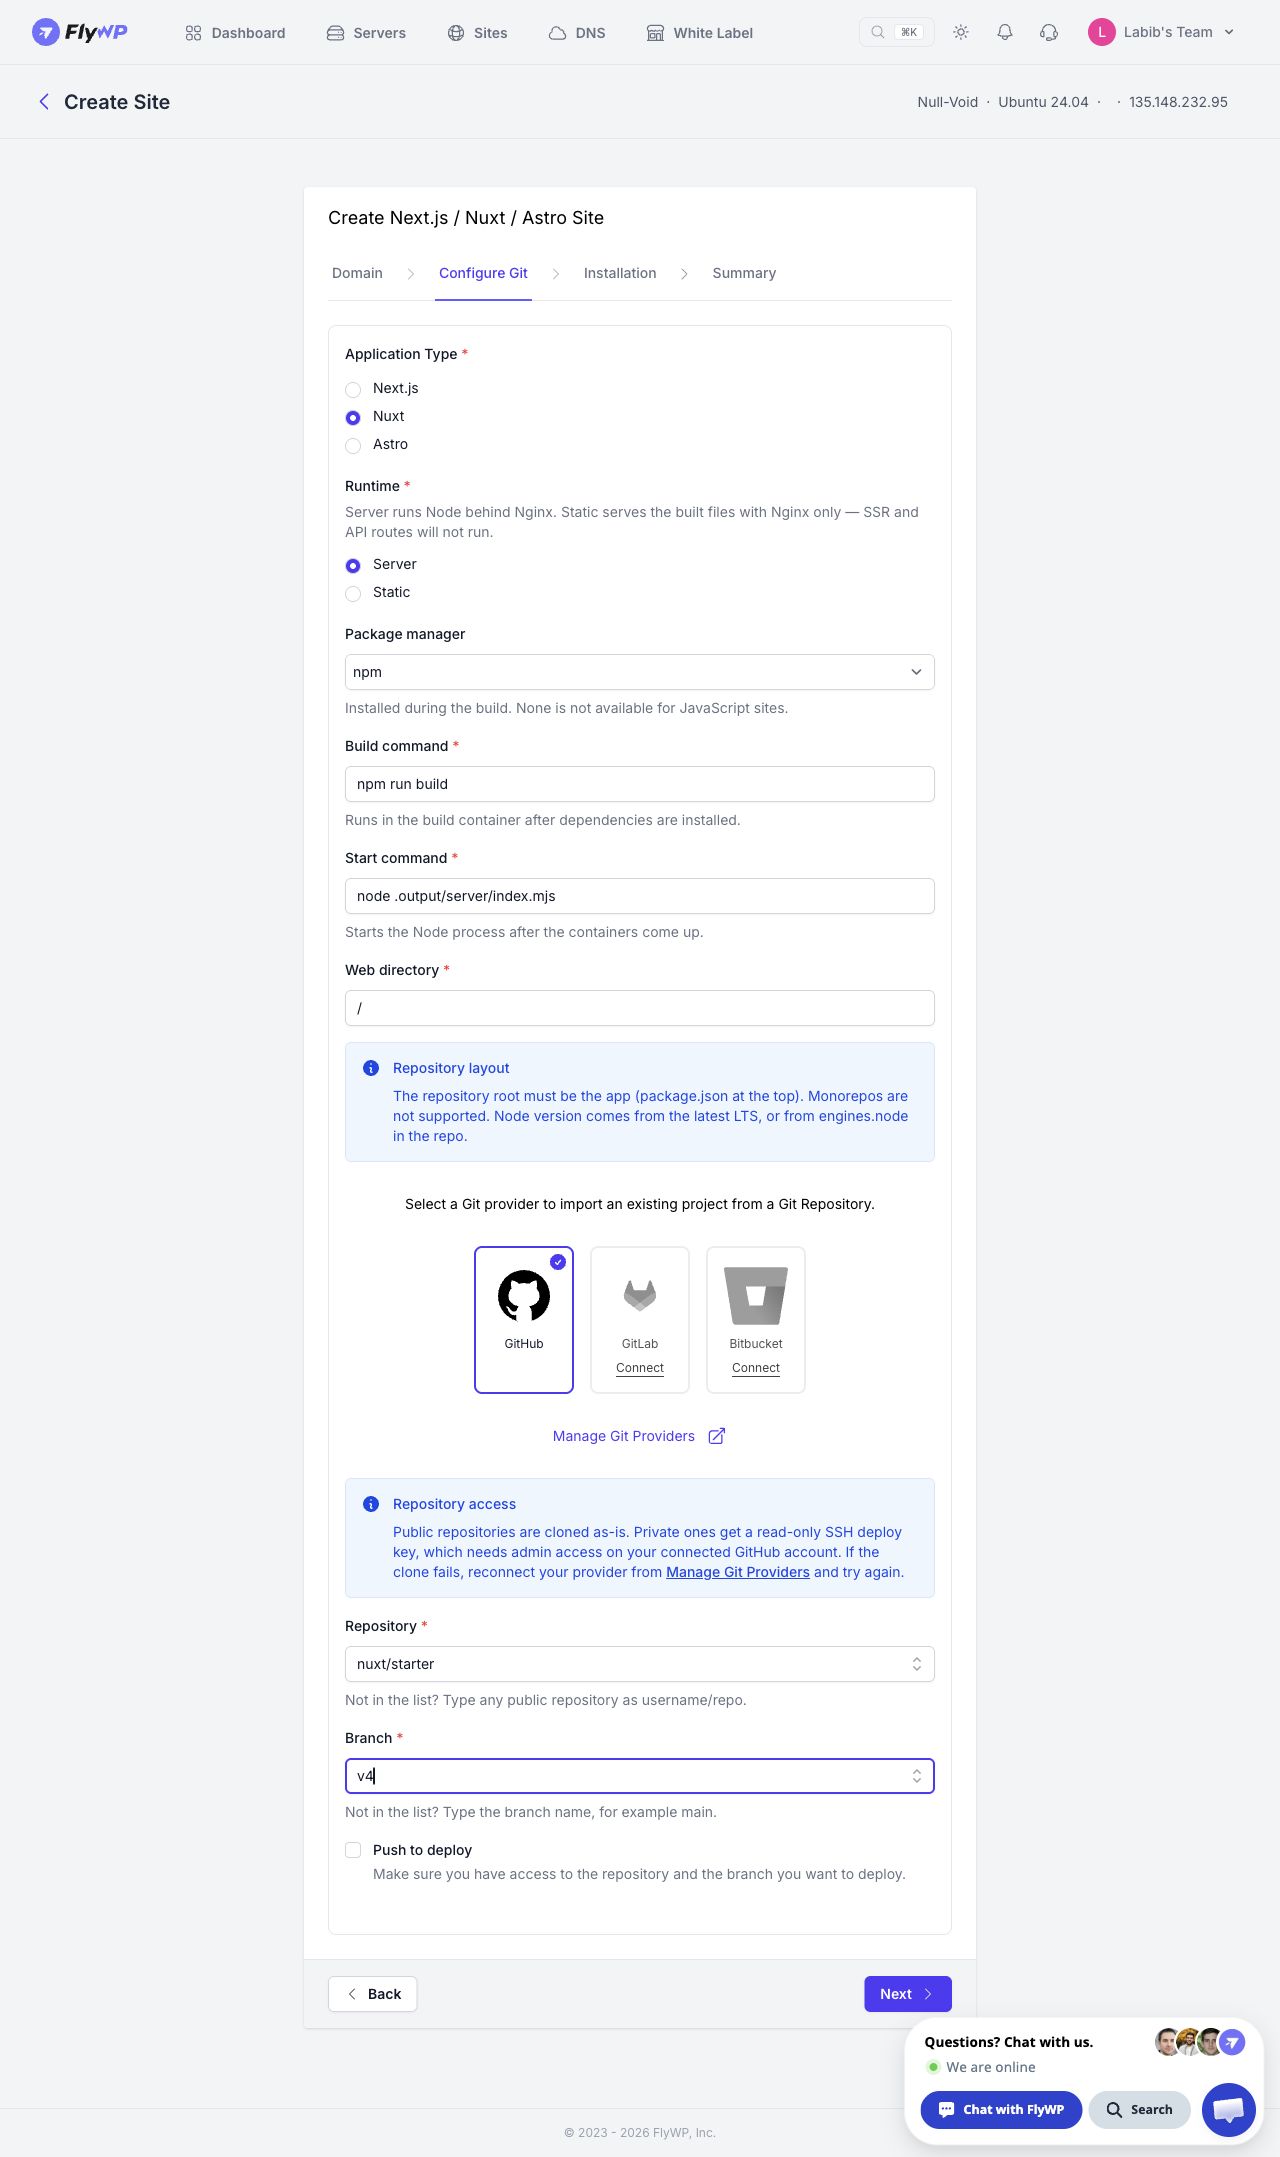
On **Configure Git**, select **Application Type**, then choose a **Runtime**:
| Runtime | How the site runs | Use it when |
| ------- | --------------------------------------------------------------- | ----------------------------------------------------------------- |
| Server | A Node process runs behind Nginx | Your application needs request-time rendering or server endpoints |
| Static | Nginx serves generated files without a Node application process | Your build produces a complete static website |
Static runtime does not execute SSR or API routes. Choosing Static does not automatically convert your application into a static export.
Choose **npm**, **yarn**, or **pnpm** under **Package manager**. The wizard says dependencies are installed during the build, before **Build command** runs. Use a build command matching the selected package manager, such as `npm run build`, `yarn build`, or `pnpm run build`. JavaScript sites do not offer a package manager value of None.
Enter **Start command** for Server runtime. This field is hidden for Static runtime. Set **Web directory** using the relevant framework guide; do not publish the repository root as a static site.
Select your Git provider and search for the **Repository** and **Branch**. For an unlisted public repository, type `owner/repository` and select **Use public repository**. Choose the branch you intend to release. Review commands and paths again after changing application type or runtime, because those selections can change defaults.
Enable **Push to deploy** if pushes to the selected branch should trigger deployments. Leave it disabled if you want to control release timing yourself.
Git source selection example using the public nuxt/starter repository. Push to deploy is disabled in this example.
Select the image to view the full screen.
## 5. Review and create the site
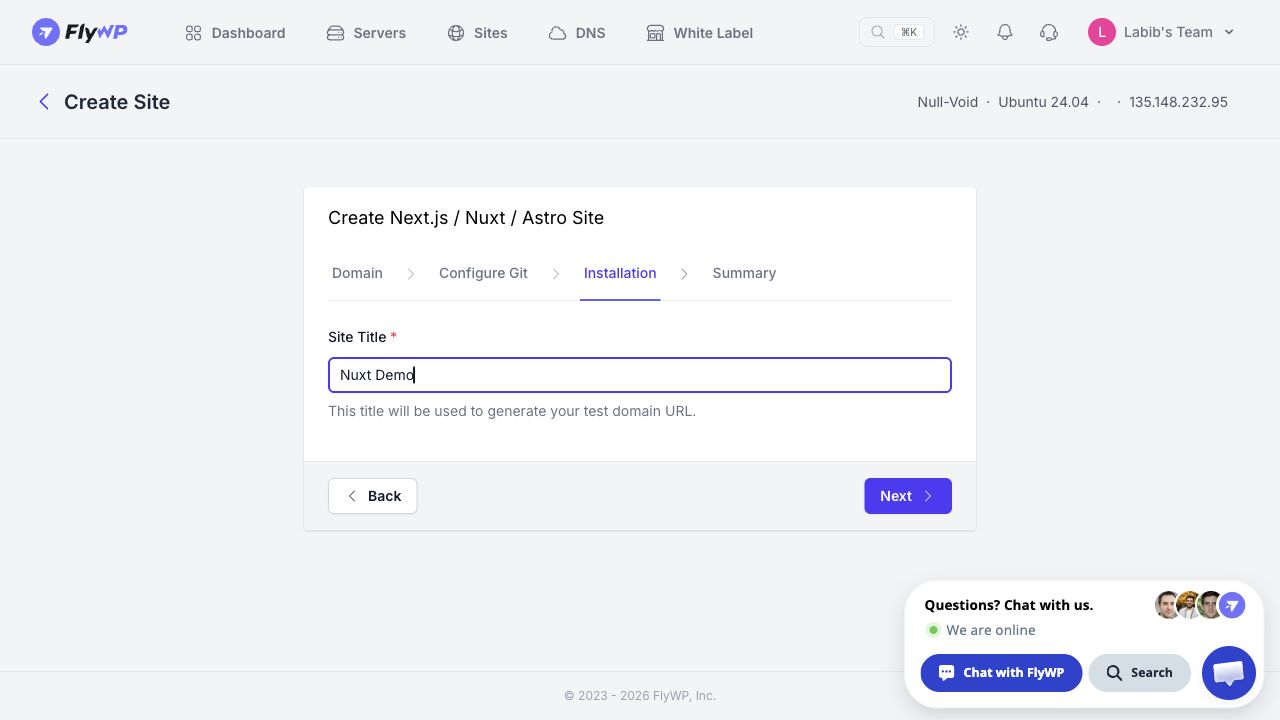
Click **Next** to reach **Installation**. In the inspected test-domain flow, this step requests **Site Title**, which is used to generate the test hostname. Complete the fields shown for your domain choice, then continue to **Summary**.
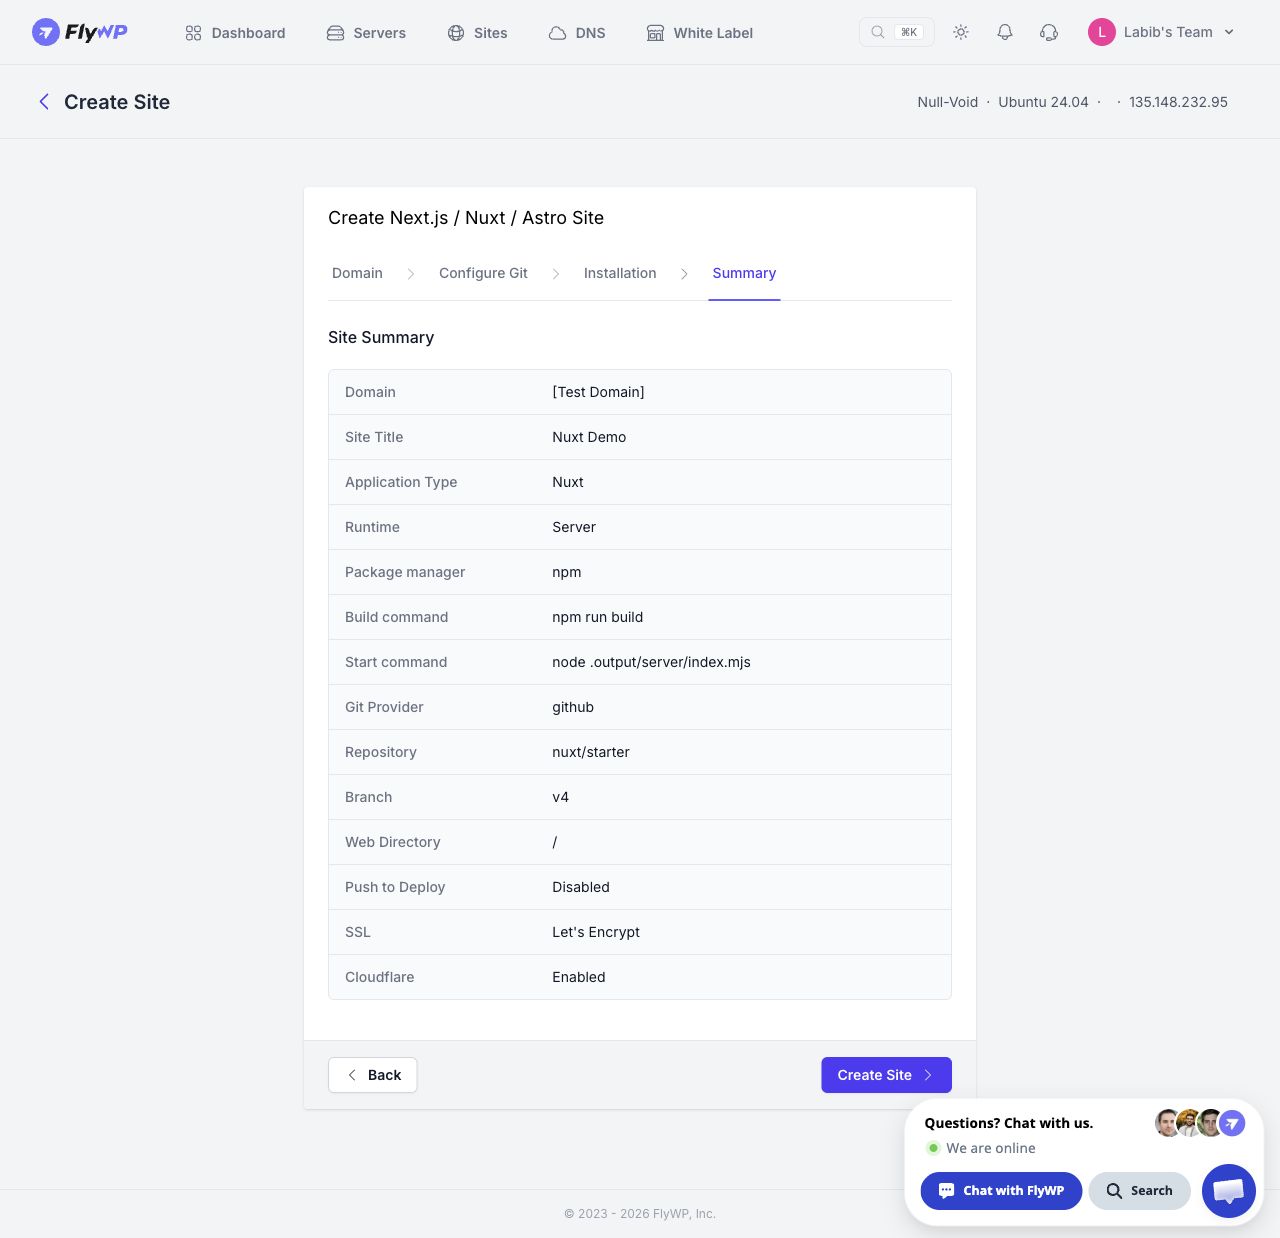
Review the domain, framework, runtime, package manager, commands, provider, repository, branch, web directory, deployment trigger, and SSL/DNS settings. Click **Create Site** when the configuration is correct.
The Installation step for a test-domain site. Select the image to view the full screen.
Review example for Nuxt Server. The Create Site button was not submitted. Select the image to view the full screen.
## 6. Verify the first deployment
After creation, review the site's deployment status and available logs. Check the deployed branch and build output before treating a successful build as a successful launch.
Open the site in a signed-out browser. Test the homepage, a nested URL opened directly, CSS and JavaScript loading, images, and any application-specific forms, authentication, or API calls. For Server runtime, check a request that actually exercises server code. For Static runtime, confirm every intended page exists in the generated output.
Configure application environment variables through the mechanism available for the site before a build or restart needs them. Public variables may be compiled into browser files; server credentials must remain private. The inspected creation flow contains no environment-variable field. The framework guides explain variable behavior, while the exact FlyWP injection mechanism needs confirmation for your deployed site.
## Deploy updates and recover a release
Commit changes and push to the configured branch. With **Push to deploy** enabled, check the resulting deployment and repeat the relevant browser tests. With it disabled, use the deployment control available on the created site; this guide does not assume an unverified button label.
FlyWP documents a `git pull --ff-only` update workflow. Avoid editing the deployed checkout or rewriting the release branch's history. If a release introduces a problem, revert the offending change in your development checkout, push the new revert commit, and deploy it. Treat database migrations and persistent application data separately: reverting source does not reverse them.
## Troubleshooting
| Problem | Check |
| ------------------------------------ | ------------------------------------------------------------------------------------------------ |
| Cannot proceed through Configure Git | Provider connection, selected repository, branch, and required commands |
| Private repository cannot clone | Repository admin access, organization authorization, and Git provider connection |
| `package.json` not found | Application is at the repository root; a monorepo is unsupported |
| Build fails | First meaningful error, Node compatibility, lockfile, dependencies, and required build variables |
| Static site shows 403/404 | Web directory points to generated HTML, including an entry page |
| Server site returns 502 | Start command, process logs, host binding, and proxy-to-application port agreement |
| Git update refuses to fast-forward | Diverged branch history or changes made directly in the deployed checkout |
## Related guides
- [Deploy a Next.js Site on FlyWP Through Git](https://flywp.com/docs/site/nodejs-sites/nextjs/)
- [Deploy a Nuxt Site on FlyWP Through Git](https://flywp.com/docs/site/nodejs-sites/nuxt/)
- [Deploy an Astro Site on FlyWP Through Git](https://flywp.com/docs/site/nodejs-sites/astro/)